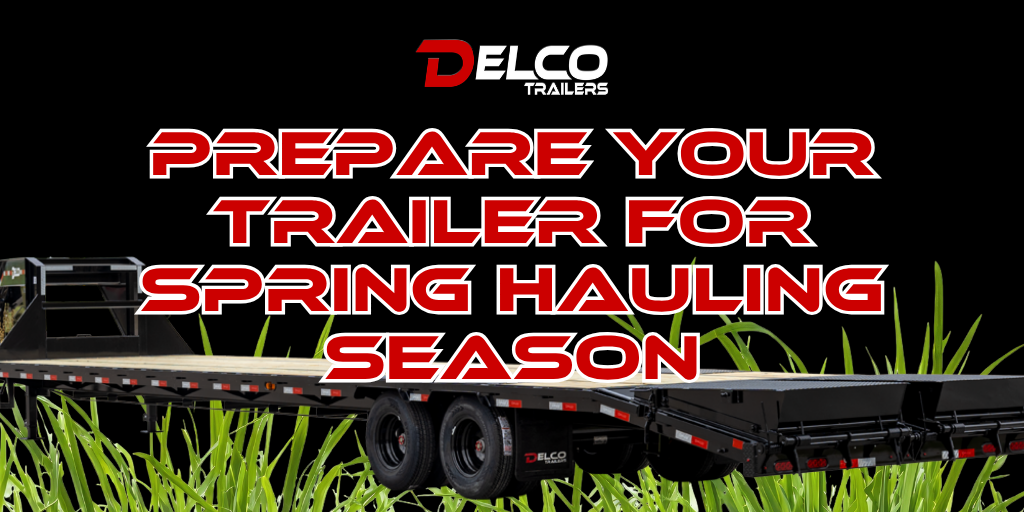
Spring is the busiest time of year for trailer owners — whether you’re hauling equipment for landscaping season, moving cattle to summer pasture, or loading up a utility trailer for cleanup and construction jobs. After sitting through winter, your trailer needs attention before it goes back to work.
Skipping this step is how you end up stranded on the side of the road with a blown tire, a bad coupler, or brake lights that haven’t worked since October. Spend two hours on this checklist now and you’ll avoid a season full of headaches.
Full Spring Trailer Inspection Checklist
1. Tires — Start Here
Tires are the most common cause of trailer breakdowns and one of the easiest things to prevent.
Check each tire for:
- Pressure: Trailer tires often lose pressure through winter. Check cold pressure against the sidewall rating — don’t guess.
- Tread depth: Use a penny. If you can see Lincoln’s full head, it’s time to replace.
- Sidewall cracks: Winter cold and UV exposure causes sidewall cracking even on tires that look okay on the tread. Run your hand around the sidewall and look for dry rot or cracking — these tires should be replaced before they fail on the highway.
- Age: Trailer tires have a service life of 5–7 years regardless of tread depth. Check the DOT code on the sidewall (the last 4 digits are the week and year of manufacture). If your tires are older than 7 years, replace them.
Don’t forget the spare. When’s the last time you checked it? If you’re going to need it, that’s the worst time to find out it’s flat or cracked.
2. Wheel Bearings
Wheel bearing failure at highway speed is a catastrophic event — and it’s completely preventable. Bearings should be repacked or replaced annually if you use your trailer regularly.
Signs of worn bearings:
- Humming or growling sound while rolling
- Excessive heat at the hub after a short drive (careful — the hub can be hot enough to burn)
- Play or wobble when you grab a tire and try to move it side-to-side
If you’re not comfortable repacking bearings yourself, any trailer dealer or shop can do it in under an hour. This is not optional maintenance.
3. Brakes
Electric trailer brakes need to be inspected and adjusted seasonally. Brakes that worked last fall may have corroded or adjusted out of spec through winter.
What to check:
- Brake magnets: With the trailer unplugged, you can manually trigger the brakes by connecting your breakaway cable. Grab each hub and check that you feel the brake engaging. No engagement means a failed magnet.
- Brake adjustment: Drum brakes need to be properly adjusted to engage at the right point. Incorrectly adjusted brakes either don’t stop you effectively or drag when you don’t want them to.
- Brake controller calibration: Sit in your truck, hook up the trailer, and test brake controller response before loading. It should be able to stop the trailer without the truck stopping it for you.
- Breakaway battery: The breakaway kit has a small battery that activates the brakes if the trailer separates from the truck. Test it annually — if the battery is dead, the system doesn’t work.
4. Lights and Wiring
Trailer lights fail more than almost anything else. Corrosion, pinched wires, blown bulbs, and bad grounds are the usual culprits.
Plug in and walk the trailer while someone applies the brakes and signals:
- Brake lights (all)
- Running lights (all)
- Turn signals (left and right, front and rear)
- Clearance lights
Common problem areas:
- Corroded plug connections — clean with electrical contact cleaner
- Wires that have rubbed through where they contact the frame — wrap with electrical tape or replace
- Bad grounds — the most common cause of phantom electrical problems. The ground wire must make solid metal-to-metal contact with the trailer frame.
LED light upgrades are worth considering if you’re constantly fighting bulb failures. They last significantly longer and draw less power.
5. Hitch, Coupler, and Safety Chains
Coupler:
- Open and close the coupler latch several times — it should move freely and lock solidly
- Check for wear in the coupler ball socket — if there’s visible slop, it needs replacing
- Lubricate the coupler ball contact point
Safety Chains:
- Check for wear, kinks, or links that look stretched or cracked
- Make sure the attachment points to the trailer frame are solid — not just clipped to a bolt
- Chains should be crossed under the tongue in an X pattern when connected
Jack:
- Crank the jack fully up and down — look for bent or binding sections
- Lubricate the screw mechanism
For gooseneck trailers:
- Inspect the king pin for wear
- Check the neck-to-main frame connection point for any signs of cracking or fatigue at the welds
6. Deck and Floor
Open utility trailers and flatbeds:
- Walk the full deck and look for soft spots, cracked or split boards, or loose fasteners
- Any board that flexes or feels spongy underfoot needs to be replaced before you load equipment on it
- Check that all deck boards are fully secured — loose boards can shift under load
Dump trailers:
- Inspect the hydraulic cylinder and hoses — look for oil seepage at fittings and along the cylinder
- Test the dump function unloaded before you put a full load in it
- Check that the tailgate latches and opens/closes properly
Stock trailers:
- Inspect the floor boards for rot — particularly at the edges and around the drain holes
- Look for soft or spongy spots and replace immediately
- Check that floor drains are open and not packed with debris
7. Ramp Gate and Springs
If your trailer has a rear ramp gate, the springs are what make it manageable. Weak or broken ramp springs mean you’re lifting dead weight every time you load — and a ramp that slams down unexpectedly is a serious safety hazard.
Check ramp springs:
- Look for broken coils or visible cracks in the spring
- Test the ramp — it should lower smoothly with controlled resistance, not slam down
- It should also be possible to lift it back up without excessive force
Ramp spring kits are available through trailer parts suppliers if yours need replacement — this is a straightforward repair.
8. Frame and Welds
Do a slow walk-around and look at the frame, crossmembers, and any visible weld points.
Signs to watch for:
- Rust that has progressed to pitting or structural thinning
- Cracks at weld joints, particularly at high-stress points like coupler mounting, axle mounting, and ramp hinge points
- Any area that looks bent or deformed
Surface rust on a steel trailer is normal and manageable — keep it wire-brushed and painted. Deep pitting or cracking at welds is a different story and needs professional assessment.
Quick Reference: Seasonal Maintenance Schedule
| Interval | Tasks |
|---|---|
| Before every haul | Tire pressure, lights, coupler lock |
| Monthly (during season) | Inspect tires for damage, check hitch components |
| Every 6 months | Grease bearings, check brake adjustment, inspect floor |
| Annually | Repack or replace bearings, full electrical inspection, frame inspection |
When to Call a Dealer
Some things are DIY. Some aren’t. If you find cracked welds in the frame, a brake system that isn’t responding correctly, or structural damage to the floor or tongue, get a professional assessment before you load anything on that trailer.
Delco Trailers has 183+ dealers across the country — most of them are full-service shops that can handle trailer repair and inspection. [Find a dealer near you →]